Did somebody say Business Cards and Build Kits?

Business Cards

Well, exciting news, we’ve finally ordered a small run of Accessible Pixel business cards.

Accessible Pixel Business Card – Front

Normally we’d use VistaPrint, but their prices aren’t that competitive any-more and you can only order 100 cards minimum, so I’ve tried a different company – 123Print. We have our first run of 50 on order with 280GSM paper stock, colour and double sided. We would have liked to have had rounded corners and thicker paper stock, but for a test run it has to be the most cost effective option that we choose 🙂

Accessible Pixel Business Card – Back


kits

The topic eluded to something else too…Kits! Yes, we now have an idea of how much kits will cost, and what it will realistically cost us to produce them.

A basic component kit* will include:

  • 1 x Arduino Nano Clone OR 1 x Arduino Pro Mini Clone (Your Choice)
  • 2 x WS2812 5050 LED 8 Pixel Module
  • 1 x 1000uF Electrolytic Capacitor
  • 2 x 470ohm Resistor
  • 3 x Pieces of connecting wire (Black, Red and Blue)
  • 1 x Piece of lead based solder
  • 1 x 3×4 matrix keypad
  • 1 x Mini USB Cable
  • 3 x Female Header Pins
  • 10 x Male Header Pins
  • 3 x Accessible Pixel Business Cards
  • 1 x Mini CD-ROM containing the Accessible Pixel code, drivers and the Arduino IDE
  • 1 x Cardboard Box (White Outside, Brown Inside)
  • 1 x Anti-static Protective Bag

A full build kit* will include all of the above plus:

  • 1 x 3D Printed Housing (Black)
  • 1 x Semi-Transparent Acrylic Plastic Front Cover (White)
  • 4 x Mounting screws
  • 1 x Microphone
  • 4 x Black Cable Ties

If you see us at an event, we will also include:

  • 1x 1200mAh USB Powerbank
  • 1x Micro USB Cable

We would like to include Powerbanks with every kit, however the postal service has restrictions on sending lithium based batteries through the post, so we can only include the Powerbank with kits that are bought from us at an event.

We are hoping to offer basic kits that will be available for a minimum donation of £20* to the project (+shipping) and hoping to offer the full build kits for a minimum donation of £30* plus shipping.

Please let us know if you are interested as demand may outstrip supply if we don’t know how many people are interested. We will also announce when the first kits are available. The full build kit won’t be available for a while since we are still designing them, however the component kits will be available soon depending on demand for them. If you would like to register your interest in one, please email media@accessiblepixel.com and let us know!

* Specifications and prices are subject to change without notice.

Inexpensive Powerbanks

Some inexpensive Powerbanks, which we bought at Poundland, a high-value discount store where most things cost just £1 GBP. We saw these Powerbanks a long time ago, but never decided to buy them – and regretted it. They were out of stock for a few weeks, but finally came back into our local store recently. They come with the Powerbank, a keyring, a cord and a small USB micro cable (about 15cm).

The capacity is rated at 1,200mAh. The Powerbank outputs a maximum of 1A at 5V, anything higher than an amp and the Powerbank struggles. When the capacity runs down, the power output is adjusted downwards to remain active. They are charged between 800mAh and 1000mA so a standard Wall Adaptor USB Plug will charge these just fine. While these are rated 1A, I wouldn’t rely on them for anything above 500mA. Still, as an inexpensive power source for small projects, you cannot beat the affordability.

Coupling these Powerbanks with USB key-chain 3 LED light circuit boards is an excellent idea. We bought these chip based USB plug devices from China on eBay for £1.98 for 10 pieces. They are exceptionally bright, and will last a while using one of these Powerbanks and make great emergency lights.

capacity tests

Battery Discharge 1 Charge 1 Discharge 2 Charge 2
Black 0500 mAh 0932 mAh 0640 mAh 0902 mAh
Pink 0600 mAh 0972 mAh 0580 mAh 0974 mAh
Blue 0600 mAh 0987 mAh 0534 mAh 0924 mAh
Green 0590 mAh 1027 mAh 0620 mAh 1016 mAh
White 0601 mAh 0943 mAh 0597 mAh 0984 mAh

These tests are based on using a KCX-17 USB Charge Monitor with a Drok Resistive USB Discharge Device running at a load of 500mA until the Powerbanks cut-off voltage was reached. This table does not account for the losses converting from the Lithium cell’s 3.7 volts to 5 volts.

Summary

Capacity however is what lets these Powerbanks down. While they claim 1200mAh, the cells are closer to 1,000mAh, and with conversion to 5v this capacity drops further to around 700mAh. All things considered though, you get not only the plastic case, circuit board, 18650 cell, cord, keyring and a USB cable there’s nothing stopping you opening up the Powerbank and adding a better 18650 cell (for example an unprotected 2,500mAh Samsung INR-25R for about £11.15 for two). These style plastic powerbanks are available without cell from China for 99p which in itself is good value, adding a lithium cell to them and selling them for £1 is great economy.

P.S: The only colour we don’t have is the Orange Powerbank, as they did not have any of those left.

More Microcontrollers – Digispark ATTiny85

Browsing eBay for additional Arduino hardware, I came across a Digispark ATTiny85 clone for £1.99 shipped from the UK. You can get them cheaper in bulk from China though. I did some searching on YouTube to see the kind of things that this development board is capable of. I initially searched for compatibility with the WS2812 LED strings, and yes – there’s someone running the Adafrult Neopixel Library and the srandtest sketch on the Digispark ATTiny85 🙂

These tiny boards can also be used for many other projects – including emulating a USB Keyboard. I might make something to switch input over on the future video recordings 🙂

Here are some specifications:

  • 16.5mHz Microcontroller
  • Power via USB or external source – 5v or 7-35v (Recommend 12v if 5v not available)
  • On-board 500ma 5v regulator
  • 6 I/O Pins (2 of which are used for USB port only if your program uses the USB port, otherwise all 6 are available)
  • 8k Flash Memory (~6k free after bootloader)
  • I2C and SPI (via USI)
  • PWM on 3 pins (more is possible via software PWM)
  • ADC on 4 pins
  • Power LED and Test/Status LED

One thing I quite like is the built in voltage regulator, this will come handy for tiny embedded projects!

There are some caveats to be aware of using this board though. There is no reverse voltage protection, so applying GND and +5 the wrong way around will almost certainly damage the board so perhaps a Diode would be helpful here or a MOSFET?

When uploading a sketch, you have to unplug and re-plug the device to enter programming mode (which the device stays in for 5000ms) then it will run whatever sketch you have uploaded to it.

I’m looking forward to testing this hardware out and now I’m just waiting for delivery 🙂

New Testing Hardware Arrived and New Code

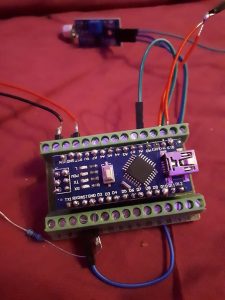
So, my new Nano testing board with screw terminal break out shield arrived. My soldering is not perfect, but I am still waiting on some flux and desoldering wick to arrive to have another go at it. I’ve certainly seen worse though 🙂

The new iteration of the code adds more animations and control with the keypad. We’ll soon start making videos and uploading them so you can get a glimpse into Team Accessible Pixel’s workshop 🙂

// interrupt_animation_3.ino
// designed by AccessiblePixel.com
//Include Libraries
#include <Adafruit_NeoPixel.h>
#include <Keypad.h>
#ifdef __AVR__
#include <avr/power.h>
#endif
// Initialise Variables
#define PINBACK 9 // PIN for REAR light
#define PINFLOOR 10 // PIN for FLOOR light
#define PINFRONT 11 // PIN for FRONT light
volatile int frame=0;
volatile int backcolorframe=0;
volatile int r = 0;
volatile int g = 0;
volatile int b = 0;
volatile int brightred = 0;
volatile int brightgreen = 0;
volatile int brightblue = 0;
volatile int brightcolor = 0;
volatile int up = 0;
volatile int rainbowi = 0;
volatile int rainboww = 0;
// Initialise Pixels
Adafruit_NeoPixel stripBack = Adafruit_NeoPixel(16, PINBACK, NEO_GRB + NEO_KHZ800);
Adafruit_NeoPixel stripFloor = Adafruit_NeoPixel(16, PINFLOOR, NEO_GRB + NEO_KHZ800);
Adafruit_NeoPixel stripFront = Adafruit_NeoPixel(16, PINFRONT, NEO_GRB + NEO_KHZ800);
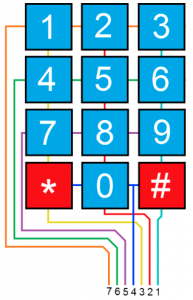
// Setup Keypad
const byte ROWS = 4; // Four rows
const byte COLS = 3; // Three columns
// Define the Keymap
char keys[ROWS][COLS] = {
{'1','2','3'},
{'4','5','6'},
{'7','8','9'},
{'*','0','#'}
};
// Connect keypad ROW0, ROW1, ROW2 and ROW3 to these Arduino pins.
byte rowPins[ROWS] = { 8, 7, 6, 5 };
// Connect keypad COL0, COL1 and COL2 to these Arduino pins.
byte colPins[COLS] = { 4, 3, 2 }; 
// Create the Keypad
Keypad kpd = Keypad( makeKeymap(keys), rowPins, colPins, ROWS, COLS );
// Main Setup Loop (Run Once At Start Up)
void setup() {
// Initialize Back Pixels
stripBack.begin();
stripBack.show(); 
// Initialize Floor Pixels
stripFloor.begin();
stripFloor.show();
// Initialize Front Pixels
stripFront.begin();
stripFront.show();
// Setup Interrupt at 32hz
// Stop Interrupts
cli();
// Clear Timer Register
TCCR1A = 0;// Set entire TCCR1A register to 0
TCCR1B = 0;// Same for TCCR1B
TCNT1  = 0;// Initialize counter value to 0
// set compare match register for 32hz increments
OCR1A = 488;// = (16*10^6) / (32*1024) - 1 (must be <65536)
// turn on CTC mode
TCCR1B |= (1 << WGM12);
// Set CS10 and CS12 bits for 1024 prescaler
TCCR1B |= (1 << CS12) | (1 << CS10);  
// enable timer compare interrupt
TIMSK1 |= (1 << OCIE1A);
// Allow Interrupts
sei();
}//end setup loop
// Function Declarations
uint32_t wheelz(byte WheelPos) {
WheelPos = 255 - WheelPos;
if(WheelPos < 85) {
return stripBack.Color(255 - WheelPos * 3, 0, WheelPos * 3);
}
if(WheelPos < 170) {
WheelPos -= 85;
return stripBack.Color(0, WheelPos * 3, 255 - WheelPos * 3);
}
WheelPos -= 170;
return stripBack.Color(WheelPos * 3, 255 - WheelPos * 3, 0);
}
void colorWipe(uint32_t c, uint8_t wait) {
for(uint16_t i=0; i<stripBack.numPixels(); i++) {
stripBack.setPixelColor(i, c);
stripBack.show();
delay(wait);
}
}
// Run Animation Frames
ISR(TIMER1_COMPA_vect){
if(frame==1){ 
stripBack.setPixelColor(0,r,g,b);
stripBack.show(); 
frame++;
}
else if(frame==2) {  
stripBack.setPixelColor(1,r,g,b);
stripBack.show(); 
frame++;
}
else if(frame==3) {  
stripBack.setPixelColor(2,r,g,b);
stripBack.show(); 
frame++;
}
else if(frame==4) {  
stripBack.setPixelColor(3,r,g,b);
stripBack.show(); 
frame++;
}
else if(frame==5) {  
stripBack.setPixelColor(4,r,g,b);
stripBack.show(); 
frame++;
}
else if(frame==6) {  
stripBack.setPixelColor(5,r,g,b);
delay(50);
stripBack.show(); 
frame++;
}
else if(frame==7) {  
stripBack.setPixelColor(6,r,g,b);
stripBack.show(); 
frame++;
}
else if(frame==8) {  
stripBack.setPixelColor(7,r,g,b);
delay(50);
stripBack.show(); 
frame++;
}
else if(frame==9) {  
stripBack.setPixelColor(8,r,g,b);
stripBack.show(); 
frame++;
}
else if(frame==10) {  
stripBack.setPixelColor(9,r,g,b);
stripBack.show(); 
frame++;
}
else if(frame==11) {  
stripBack.setPixelColor(10,r,g,b);
stripBack.show(); 
frame++;
}
else if(frame==12) {  
stripBack.setPixelColor(11,r,g,b);
stripBack.show(); 
frame++;
}
else if(frame==13) {  
stripBack.setPixelColor(12,r,g,b);
stripBack.show(); 
frame++;
}
else if(frame==14) {  
stripBack.setPixelColor(13,r,g,b);
stripBack.show(); 
frame++;
}
else if(frame==15) {  
stripBack.setPixelColor(14,r,g,b);
stripBack.show(); 
frame++;
}
else if(frame==16) {  
stripBack.setPixelColor(15,r,g,b);
stripBack.show(); 
}
else if(frame==17){ 
stripBack.setPixelColor(15,0,0,0);
stripBack.show(); 
frame++;
}
else if(frame==18) {  
stripBack.setPixelColor(14,0,0,0);
stripBack.show(); 
frame++;
}
else if(frame==19) {  
stripBack.setPixelColor(13,0,0,0);
stripBack.show(); 
frame++;
}
else if(frame==20) {  
stripBack.setPixelColor(12,0,0,0);
stripBack.show(); 
frame++;
}
else if(frame==21) {  
stripBack.setPixelColor(11,0,0,0);
stripBack.show(); 
frame++;
}
else if(frame==22) {  
stripBack.setPixelColor(10,0,0,0);
stripBack.show(); 
frame++;
}
else if(frame==23) {  
stripBack.setPixelColor(9,0,0,0);
stripBack.show(); 
frame++;
}
else if(frame==24) {  
stripBack.setPixelColor(8,0,0,0);
delay(50);
stripBack.show(); 
frame++;
}
else if(frame==25) {  
stripBack.setPixelColor(7,0,0,0);
stripBack.show(); 
frame++;
}
else if(frame==26) {  
stripBack.setPixelColor(6,0,0,0);
stripBack.show(); 
frame++;
}
else if(frame==27) {  
stripBack.setPixelColor(5,0,0,0);
stripBack.show(); 
frame++;
}
else if(frame==28) {  
stripBack.setPixelColor(4,0,0,0);
stripBack.show(); 
frame++;
}
else if(frame==29) {  
stripBack.setPixelColor(3,0,0,0);
stripBack.show(); 
frame++;
}
else if(frame==30) {  
stripBack.setPixelColor(2,0,0,0);
stripBack.show(); 
frame++;
}
else if(frame==31) {  
stripBack.setPixelColor(1,0,0,0);
stripBack.show(); 
frame++;
}
else if(frame==32) {  
stripBack.setPixelColor(0,0,0,0);
stripBack.show(); 
} else if(frame==33) {
stripBack.setPixelColor(random(0,15),random(0,25),random(0,25),random(0,25));
stripBack.setPixelColor(random(0,15),0,0,0,0);
delay(30);
stripBack.show();
}
else if(frame==34){stripBack.setPixelColor(0,0,0,0);
stripBack.setPixelColor(1,0,0,0);
stripBack.setPixelColor(2,0,0,0);
stripBack.setPixelColor(3,0,0,0);
stripBack.setPixelColor(4,0,0,0);
stripBack.setPixelColor(5,0,0,0);
stripBack.setPixelColor(6,0,0,0);
stripBack.setPixelColor(7,0,0,0);
stripBack.setPixelColor(8,0,0,0);
stripBack.setPixelColor(9,0,0,0);
stripBack.setPixelColor(10,0,0,0);
stripBack.setPixelColor(11,0,0,0);
stripBack.setPixelColor(12,0,0,0);
stripBack.setPixelColor(13,0,0,0);
stripBack.setPixelColor(14,0,0,0);
stripBack.setPixelColor(15,0,0,0);
stripBack.show();
}
else if(frame==35){
stripBack.setPixelColor(0,brightred,brightgreen,brightblue);
stripBack.setPixelColor(1,brightred,brightgreen,brightblue);
stripBack.setPixelColor(2,brightred,brightgreen,brightblue);
stripBack.setPixelColor(3,brightred,brightgreen,brightblue);
stripBack.setPixelColor(4,brightred,brightgreen,brightblue);
stripBack.setPixelColor(5,brightred,brightgreen,brightblue);
stripBack.setPixelColor(6,brightred,brightgreen,brightblue);
stripBack.setPixelColor(7,brightred,brightgreen,brightblue);
stripBack.setPixelColor(8,brightred,brightgreen,brightblue);
stripBack.setPixelColor(9,brightred,brightgreen,brightblue);
stripBack.setPixelColor(10,brightred,brightgreen,brightblue);
stripBack.setPixelColor(11,brightred,brightgreen,brightblue);
stripBack.setPixelColor(12,brightred,brightgreen,brightblue);
stripBack.setPixelColor(13,brightred,brightgreen,brightblue);
stripBack.setPixelColor(14,brightred,brightgreen,brightblue);
stripBack.setPixelColor(15,brightred,brightgreen,brightblue);
stripBack.show();
if (brightcolor==0) {
if (up == 0) {
if (brightred < 60) {
brightred++; 
}
else if (brightred == 60) {
brightred=60; 
up = 1;
} 
}
else if(up == 1) {
if(brightred > 0) {
brightred--;
} 
else if (brightred == 0) {
up = 0;brightcolor++;
} 
}
} 
else if (brightcolor==1) {
if (up == 0) {
if (brightgreen < 60) {
brightgreen++; 
}
else if (brightgreen == 60) {
brightgreen=60; 
up = 1;
} 
}
else if(up == 1) {
if(brightgreen > 0) {
brightgreen--;
} 
else if (brightgreen == 0) {
up = 0;brightcolor++;
} 
}
} 
else if (brightcolor==2) {
if (up == 0) {
if (brightblue < 60) {
brightblue++; 
}
else if (brightblue == 60) {
brightblue=60; 
up = 1;
} 
}
else if(up == 1) {
if(brightblue > 0) {
brightblue--;
} 
else if (brightblue == 0) {
up = 0;brightcolor=0;
} 
}
}            
}
else if(frame==36){
stripBack.setPixelColor(rainbowi, wheelz((rainbowi+rainboww) & 255));
stripFloor.setPixelColor(rainbowi, wheelz((rainbowi+rainboww) & 255));
stripFront.setPixelColor(rainbowi, wheelz((rainbowi+rainboww) & 255));
stripBack.show();
stripFloor.show();
stripFront.show();
if (rainbowi < 15 )
{ rainbowi++; } else if (rainbowi == 15) { rainbowi = 0; }
if (rainboww < 255 )
{rainboww++; } if (rainboww == 255) {rainboww =0; }
}
else if(frame==37){frame=0;}
}
void loop()
{
char key = kpd.getKey();
if(key)  // Check for a valid key.
{
switch (key)
{
case '1':
if(backcolorframe==0) {  
r = 60;
g = 0;
b = 0;
backcolorframe++;
frame = 1;
}
else if(backcolorframe==1) {
r = 0;
g = 60;
b = 0;
backcolorframe++; frame = 1;
}
else if(backcolorframe==2) {
r = 0;
g = 0;
b = 60;
backcolorframe++; frame = 1;
}
else if(backcolorframe==3) {
r = 30;
g = 0;
b = 30;
backcolorframe++; frame = 1;
}
else if(backcolorframe==4) {
r = 30;
g = 30;
b = 30;
backcolorframe=0; frame = 1;
}
break;
case '2':
frame = 17;
backcolorframe=0;
break;
case '3':
frame = 33;
break;
case '4':
frame = 35;
up = 0;
break;
case '*':
frame = 36;
break;
case '0':
frame = 34;
backcolorframe=0;
brightcolor=0;
brightred = 0;
brightgreen = 0;
brightblue = 0;
r = 0;
g = 0;
b = 0;
up = 0;
rainbowi = 0;
rainboww = 0;
break;
default:
break;
}
}
}

Interrupt Code with Animation Frames and Keypad Input

#include <Adafruit_NeoPixel.h>
#ifdef __AVR__
#include <avr/power.h>
#endif
#define PIN 9
// Parameter 1 = number of pixels in strip
// Parameter 2 = Arduino pin number (most are valid)
// Parameter 3 = pixel type flags, add together as needed:
//   NEO_KHZ800  800 KHz bitstream (most NeoPixel products w/WS2812 LEDs)
//   NEO_KHZ400  400 KHz (classic 'v1' (not v2) FLORA pixels, WS2811 drivers)
//   NEO_GRB     Pixels are wired for GRB bitstream (most NeoPixel products)
//   NEO_RGB     Pixels are wired for RGB bitstream (v1 FLORA pixels, not v2)
//   NEO_RGBW    Pixels are wired for RGBW bitstream (NeoPixel RGBW products)
Adafruit_NeoPixel strip = Adafruit_NeoPixel(16, PIN, NEO_GRB + NEO_KHZ800);
// IMPORTANT: To reduce NeoPixel burnout risk, add 1000 uF capacitor across
// pixel power leads, add 300 - 500 Ohm resistor on first pixel's data input
// and minimize distance between Arduino and first pixel.  Avoid connecting
// on a live circuit...if you must, connect GND first.
volatile int frame=0;
#include <Keypad.h>
const byte ROWS = 4; // Four rows
const byte COLS = 3; // Three columns
// Define the Keymap
char keys[ROWS][COLS] = {
{'1','2','3'},
{'4','5','6'},
{'7','8','9'},
{'A','0','B'}
};
// Connect keypad ROW0, ROW1, ROW2 and ROW3 to these Arduino pins.
byte rowPins[ROWS] = { 8, 7, 6, 5 };
// Connect keypad COL0, COL1 and COL2 to these Arduino pins.
byte colPins[COLS] = { 4, 3, 2 }; 
// Create the Keypad
Keypad kpd = Keypad( makeKeymap(keys), rowPins, colPins, ROWS, COLS );
void setup() {
strip.begin();
strip.show(); // Initialize all pixels to 'off'
//set pins as outputs
pinMode(13, OUTPUT);
// Fill the dots one after the other with a color
cli();//stop interrupts
//set timer1 interrupt at 1Hz
TCCR1A = 0;// set entire TCCR1A register to 0
TCCR1B = 0;// same for TCCR1B
TCNT1  = 0;//initialize counter value to 0
// set compare match register for 1hz increments
OCR1A = 977;// = (16*10^6) / (8*1024) - 1 (must be <65536)
// turn on CTC mode
TCCR1B |= (1 << WGM12);
// Set CS10 and CS12 bits for 1024 prescaler
TCCR1B |= (1 << CS12) | (1 << CS10);  
// enable timer compare interrupt
TIMSK1 |= (1 << OCIE1A);
sei();//allow interrupts
}//end setup
ISR(TIMER1_COMPA_vect){//timer1 interrupt 1Hz toggles pin 13 (LED)
//generates pulse wave of frequency 1Hz/2 = 0.5kHz (takes two cycles for full wave- toggle high then toggle low)
if(frame==1){ 
strip.setPixelColor(0,60,0,0);
strip.show(); 
frame++;
}
else if(frame==2) {  
strip.setPixelColor(1,60,0,0);
strip.show(); 
frame++;
}
else if(frame==3) {  
strip.setPixelColor(2,60,0,0);
strip.show(); 
frame++;
}
else if(frame==4) {  
strip.setPixelColor(3,60,0,0);
strip.show(); 
frame++;
}
else if(frame==5) {  
strip.setPixelColor(4,60,0,0);
strip.show(); 
frame++;
}
else if(frame==6) {  
strip.setPixelColor(5,60,0,0);
delay(50);
strip.show(); 
frame++;
}
else if(frame==7) {  
strip.setPixelColor(6,60,0,0);
strip.show(); 
frame++;
}
else if(frame==8) {  
strip.setPixelColor(7,60,0,0);
delay(50);
strip.show(); 
frame++;
}
else if(frame==9) {  
strip.setPixelColor(8,60,0,0);
strip.show(); 
frame++;
}
else if(frame==10) {  
strip.setPixelColor(9,60,0,0);
strip.show(); 
frame++;
}
else if(frame==11) {  
strip.setPixelColor(10,60,0,0);
strip.show(); 
frame++;
}
else if(frame==12) {  
strip.setPixelColor(11,60,0,0);
strip.show(); 
frame++;
}
else if(frame==13) {  
strip.setPixelColor(12,60,0,0);
strip.show(); 
frame++;
}
else if(frame==14) {  
strip.setPixelColor(13,60,0,0);
strip.show(); 
frame++;
}
else if(frame==15) {  
strip.setPixelColor(14,60,0,0);
strip.show(); 
frame++;
}
else if(frame==16) {  
strip.setPixelColor(15,60,0,0);
strip.show(); 
}
else if(frame==17){ 
strip.setPixelColor(15,0,0,0);
strip.show(); 
frame++;
}
else if(frame==18) {  
strip.setPixelColor(14,0,0,0);
strip.show(); 
frame++;
}
else if(frame==19) {  
strip.setPixelColor(13,0,0,0);
strip.show(); 
frame++;
}
else if(frame==20) {  
strip.setPixelColor(12,0,0,0);
strip.show(); 
frame++;
}
else if(frame==21) {  
strip.setPixelColor(11,0,0,0);
strip.show(); 
frame++;
}
else if(frame==22) {  
strip.setPixelColor(10,0,0,0);
delay(50);
strip.show(); 
frame++;
}
else if(frame==23) {  
strip.setPixelColor(9,0,0,0);
strip.show(); 
frame++;
}
else if(frame==24) {  
strip.setPixelColor(8,0,0,0);
delay(50);
strip.show(); 
frame++;
}
else if(frame==25) {  
strip.setPixelColor(7,0,0,0);
strip.show(); 
frame++;
}
else if(frame==26) {  
strip.setPixelColor(6,0,0,0);
strip.show(); 
frame++;
}
else if(frame==27) {  
strip.setPixelColor(5,0,0,0);
strip.show(); 
frame++;
}
else if(frame==28) {  
strip.setPixelColor(4,0,0,0);
strip.show(); 
frame++;
}
else if(frame==29) {  
strip.setPixelColor(3,0,0,0);
strip.show(); 
frame++;
}
else if(frame==30) {  
strip.setPixelColor(2,0,0,0);
strip.show(); 
frame++;
}
else if(frame==31) {  
strip.setPixelColor(1,0,0,0);
strip.show(); 
frame++;
}
else if(frame==32) {  
strip.setPixelColor(0,0,0,0);
strip.show(); 
} else if(frame==33) {
strip.setPixelColor(random(16),random(0,25),random(0,25),random(0,25));
strip.setPixelColor(random(16),0,0,0,0);
delay(30);
strip.show();
}
else if(frame==34){frame=0;}
}
void loop()
{
char key = kpd.getKey();
if(key)  // Check for a valid key.
{
switch (key)
{
case '1':
frame = 1;
break;
case '2':
frame = 17;
break;
case '3':
frame = 33;
break;
default:
break;
}
}
}
void colorWipe(uint32_t c, uint8_t wait) {
for(uint16_t i=0; i<strip.numPixels(); i++) {
strip.setPixelColor(i, c);
strip.show();
delay(wait);
}
}

Timer Interrupt Test

Here is some of my test code for setting up a timer1 interrupt. It is based on some code that I found at http://www.instructables.com/id/Arduino-Timer-Interrupts/

#include <Adafruit_NeoPixel.h>
#ifdef __AVR__
#include <avr/power.h>
#endif
#define PIN 9
// Parameter 1 = number of pixels in strip
// Parameter 2 = Arduino pin number (most are valid)
// Parameter 3 = pixel type flags, add together as needed:
//   NEO_KHZ800  800 KHz bitstream (most NeoPixel products w/WS2812 LEDs)
//   NEO_KHZ400  400 KHz (classic 'v1' (not v2) FLORA pixels, WS2811 drivers)
//   NEO_GRB     Pixels are wired for GRB bitstream (most NeoPixel products)
//   NEO_RGB     Pixels are wired for RGB bitstream (v1 FLORA pixels, not v2)
//   NEO_RGBW    Pixels are wired for RGBW bitstream (NeoPixel RGBW products)
Adafruit_NeoPixel strip = Adafruit_NeoPixel(16, PIN, NEO_GRB + NEO_KHZ800);
// IMPORTANT: To reduce NeoPixel burnout risk, add 1000 uF capacitor across
// pixel power leads, add 300 - 500 Ohm resistor on first pixel's data input
// and minimize distance between Arduino and first pixel.  Avoid connecting
// on a live circuit...if you must, connect GND first.
boolean toggle1 = 0;
void setup() {
strip.begin();
strip.show(); // Initialize all pixels to 'off'
//set pins as outputs
pinMode(13, OUTPUT);
// Fill the dots one after the other with a color
cli();//stop interrupts
//set timer1 interrupt at 1Hz
TCCR1A = 0;// set entire TCCR1A register to 0
TCCR1B = 0;// same for TCCR1B
TCNT1  = 0;//initialize counter value to 0
// set compare match register for 1hz increments
OCR1A = 15624;// = (16*10^6) / (1*1024) - 1 (must be <65536)
// turn on CTC mode
TCCR1B |= (1 << WGM12);
// Set CS12 and CS10 bits for 1024 prescaler
TCCR1B |= (1 << CS12) | (1 << CS10);  
// enable timer compare interrupt
TIMSK1 |= (1 << OCIE1A);
sei();//allow interrupts
}//end setup
ISR(TIMER1_COMPA_vect){//timer1 interrupt 1Hz toggles pin 13 (LED)
//generates pulse wave of frequency 1Hz/2 = 0.5kHz (takes two cycles for full wave- toggle high then toggle low)
if (toggle1){    
digitalWrite(13,HIGH);
toggle1 = 0;
}
else{
digitalWrite(13,LOW);
toggle1 = 1;
}
}
void loop() {
colorWipe(strip.Color(1, 1, 1), 25);
colorWipe(strip.Color(0, 0, 0), 25);
}
void colorWipe(uint32_t c, uint8_t wait) {
for(uint16_t i=0; i<strip.numPixels(); i++) {
strip.setPixelColor(i, c);
strip.show();
delay(wait);
}
}

First Animation

Here is the first piece of code for the start-up and shutdown animations for the rear light. I have tried to add code to control which pixels in the string will illuminate, but it’s kinda hacky. The lights turn on one way, and off in the other direction. Perhaps someone could guide me on how to “improve” this implementation.

This code assumes that the string of lights is connected to PIN 9.

#include <Adafruit_NeoPixel.h>
#define PIN 9
Adafruit_NeoPixel strip = Adafruit_NeoPixel(16, PIN, NEO_GRB + NEO_KHZ800);
void setup() {
strip.begin();
strip.show(); // Initialize all pixels to 'off'
}
void loop() {
// put your main code here, to run repeatedly:
lightStart(135,0,0,0,16); // Red Value, Green Value, Blue Value, Start From Pixel, End At Pixel
delay(5000);
lightStop(0,0,0,0,16); // Red Value, Green Value, Blue Value, Start From Pixel, End At Pixel
delay(5000);
}
void lightStart(uint32_t r, uint8_t g,uint8_t b,uint8_t s, uint8_t m ) {
for(uint16_t i=s; i<m; i++) {
strip.setPixelColor(i,r,g,b);
strip.show();
delay(50);
}
}
void lightStop(uint32_t r, uint8_t g,uint8_t b,uint8_t s, uint8_t m ) {
for(uint16_t i=m; i>s; i--) {
strip.setPixelColor(i,r,g,b);
strip.show();
delay(50);
}
strip.setPixelColor(s,r,g,b); // Hack to work with value 0
strip.show();
delay(50);
}

Again, this is built on the Adafruit NeoPixel Library, which is required to make this sketch work.

Testing Hardware

The time has come where we need to test all the hardware we have bought to this point.

I have modified some basic test source files to test the WS2812 LEDs, the 4×3 Matrix Keypad and the Arduino Uno
To test the keypad, use the following code.

/*  Keypadtest.pde
*
*  Demonstrate the simplest use of the  keypad library.
*
*  The first step is to connect your keypad to the
*  Arduino  using the pin numbers listed below in
*  rowPins[] and colPins[]. If you want to use different
*  pins then  you  can  change  the  numbers below to
*  match your setup.
*
*/
#include <Keypad.h>
const byte ROWS = 4; // Four rows
const byte COLS = 3; // Three columns
// Define the Keymap
char keys[ROWS][COLS] = {
{'1','2','3'},
{'4','5','6'},
{'7','8','9'},
{'A','0','B'}
};
// Connect keypad ROW0, ROW1, ROW2 and ROW3 to these Arduino pins.
byte rowPins[ROWS] = { 8, 7, 6, 5 };
// Connect keypad COL0, COL1 and COL2 to these Arduino pins.
byte colPins[COLS] = { 4, 3, 2 }; 
// Create the Keypad
Keypad kpd = Keypad( makeKeymap(keys), rowPins, colPins, ROWS, COLS );
#define ledpin 14
void setup()
{
pinMode(ledpin,OUTPUT);
digitalWrite(ledpin, HIGH);
Serial.begin(9600);
}
void loop()
{
char key = kpd.getKey();
if(key)  // Check for a valid key.
{
switch (key)
{
case '*':
digitalWrite(ledpin, LOW);
break;
case '#':
digitalWrite(ledpin, HIGH);
break;
default:
Serial.println(key);
}
}
}

This is based on the standard Keypad Test Example File. This assumes that PIN 1 (onwards) from the Matrix is connected to PIN 2 (onwards) on the arduino. Pressing keys on the keypad will send data to the serial monitor in the arduino console and cause an LED to flash.

#include <Adafruit_NeoPixel.h>
#ifdef __AVR__
#include <avr/power.h>
#endif
#define PIN 6
// Parameter 1 = number of pixels in strip
// Parameter 2 = Arduino pin number (most are valid)
// Parameter 3 = pixel type flags, add together as needed:
//   NEO_KHZ800  800 KHz bitstream (most NeoPixel products w/WS2812 LEDs)
//   NEO_KHZ400  400 KHz (classic 'v1' (not v2) FLORA pixels, WS2811 drivers)
//   NEO_GRB     Pixels are wired for GRB bitstream (most NeoPixel products)
//   NEO_RGB     Pixels are wired for RGB bitstream (v1 FLORA pixels, not v2)
//   NEO_RGBW    Pixels are wired for RGBW bitstream (NeoPixel RGBW products)
Adafruit_NeoPixel strip = Adafruit_NeoPixel(16, PIN, NEO_GRB + NEO_KHZ800);
// IMPORTANT: To reduce NeoPixel burnout risk, add 1000 uF capacitor across
// pixel power leads, add 300 - 500 Ohm resistor on first pixel's data input
// and minimize distance between Arduino and first pixel.  Avoid connecting
// on a live circuit...if you must, connect GND first.
void setup() {
strip.begin();
strip.show(); // Initialize all pixels to 'off'
}
void loop() {
// Some example procedures showing how to display to the pixels:
colorWipe(strip.Color(153, 32, 153), 500); // pink-white
colorWipe(strip.Color(153, 153, 153), 500); // white
colorWipe(strip.Color(153, 32, 153), 500); // pink-white
colorWipe(strip.Color(1, 0, 0), 25); // Red
colorWipe(strip.Color(0, 1, 0), 25); // Green
colorWipe(strip.Color(0, 0, 1), 25); // Blue
colorWipe(strip.Color(10, 0, 0), 25); // Red
colorWipe(strip.Color(0, 10, 0), 25); // Green
colorWipe(strip.Color(0, 0, 10), 25); // Blue
colorWipe(strip.Color(25, 0, 0), 25); // Red
colorWipe(strip.Color(0, 25, 0), 25); // Green
colorWipe(strip.Color(0, 0, 25), 25); // Blue
colorWipe(strip.Color(50, 0, 0), 25); // Red
colorWipe(strip.Color(0, 50, 0), 25); // Green
colorWipe(strip.Color(0, 0, 50), 25); // Blue
colorWipe(strip.Color(100, 0, 0), 25); // Red
colorWipe(strip.Color(0, 100, 0), 25); // Green
colorWipe(strip.Color(0, 0, 100), 25); // Blue
colorWipe(strip.Color(153, 0, 0), 25); // Red
colorWipe(strip.Color(0, 153, 0), 25); // Green
colorWipe(strip.Color(0, 0, 153), 25); // Blue
colorWipe(strip.Color(200, 0, 0), 25); // Red
colorWipe(strip.Color(0, 200, 0), 25); // Green
colorWipe(strip.Color(0, 0, 200), 25); // Blue
// Send a theater pixel chase in...
theaterChase(strip.Color(70, 70, 70), 250); // White
theaterChase(strip.Color(70, 0, 0), 250); // Red
theaterChase(strip.Color(0, 0, 70), 250); // Blue
theaterChase(strip.Color(0, 70, 70), 250); // Blue
theaterChase(strip.Color(70, 0, 70), 250); // Blue
theaterChase(strip.Color(0, 70, 0), 250); // Blue
}
// Fill the dots one after the other with a color
void colorWipe(uint32_t c, uint8_t wait) {
for(uint16_t i=0; i<strip.numPixels(); i++) {
strip.setPixelColor(i, c);
strip.show();
delay(wait);
}
}
//Theatre-style crawling lights.
void theaterChase(uint32_t c, uint8_t wait) {
for (int j=0; j<10; j++) {  //do 10 cycles of chasing
for (int q=0; q < 3; q++) {
for (uint16_t i=0; i < strip.numPixels(); i=i+3) {
strip.setPixelColor(i+q, c);    //turn every third pixel on
}
strip.show();
delay(wait);
for (uint16_t i=0; i < strip.numPixels(); i=i+3) {
strip.setPixelColor(i+q, 0);        //turn every third pixel off
}
}
}
}

This is based on the srandtest included with the Adafruit NeoPixel Library (which is required for this to work). This assumes that your DATA pin is 6.

Power Consumption Estimates

Initially we were working on data from our supplier that each of the LEDs in the pixel strings used about 18 mA of power on average. In our default 2 x 8 stick layout, this would mean since we have 16 pixels, that would mean an average consumption of 288mA per Accessible Pixel Stick. However, these estimates aren’t quite right for maximum power consumption.

18mA per LED: 16 x 18mA = 288mA per Accessible Pixel Stick
Approximate power dissipation ( 5v x 0.66A ): 1.44 watts

After testing both an NeoPixel clone from the UK mixed with a generic WS2812-8 from China, the maximum current draw that we have measured is approximately 660mA. This is with every pixel set to maximum (255 on each colour) so it’s a very bright almost white.

Working backwards this means that the maximum current draw would be 660mA

660mA / 16 = 41.25mA per LED
Approximate power dissipation ( 5v x 0.66A ): 3.3 watts

Knowing what we know about LEDs, however, each LED would theoretically draw a maximum of about 20mA, so each pixel at full intensity would run at 60mA giving us a total per Accessible Pixel Stick of 960mA

20mA per LED: 16 x 60mA = 960mA per Accessible Pixel Stick
Approximate Power dissipation ( 5v x 0.96A ): 4.8 watts

Of course, we won’t be running these LEDs at maximum, for both thermal and for the life of the LED strips. We’d probably recommend running them at 60% of maximum as the highest setting.

960mA * 60 / 100 = 576mA per Accessible Pixel Stick
Approximate Power dissipation ( 5v x 0.576A ): 2.88 watts

2.88 watts over 16 LEDs sounds like a good upper limit for the LEDs to us.

Donations at GoFundMe

Lighting projects and the tools to create them are not easy to access. We want to create accessible lighting modules for use on accessible vehicles (such as wheelchairs), bags and clothing.

Often lighting projects, especially for wheelchairs, are very clinical or medical – We wish to bring colourful and unique designs that are tailored around user’s specific needs.

We also wish to release the code as open source to teach other people and therefore giving them the knowledge. With relative ease our designs can be used and modified at little to no cost to the end user.

.

Skip to content